3.11 Connection of Doorphones, Door Openers, External Sensors, and External Relays
3.11.1 Connection of Doorphones, Door Openers, External Sensors, and External Relays
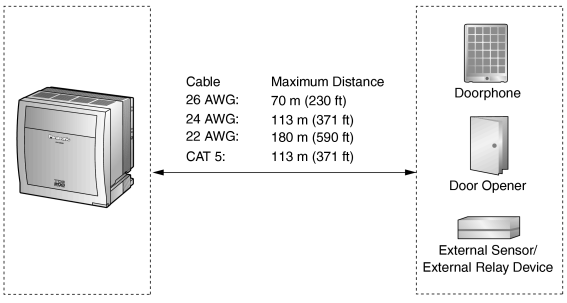
| The PBX supports a maximum of 16 doorphones, 16 door openers, 16 external sensors, and 16 external relays. |
Note
|
Doorphones, door openers, external sensors, and external relays are user-supplied. |
|
Installing the Doorphone (KX-T30865/KX-T7765/KX-T7775)
Notes
|
• |
The illustrations shown in the installation procedure are based on the KX-T30865. |
|
• |
For details about the installation of the KX-T7775, refer to the Operating Instructions of the KX-T7775. |
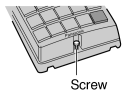
| 1. |
Loosen the screw to separate the doorphone into 2 halves. |
|
|
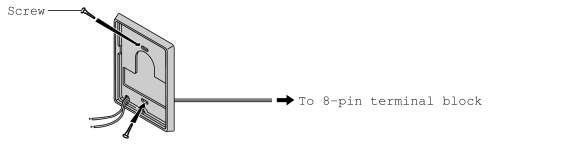
| 2. |
Pass the wires through the hole in the base cover, and attach the base cover to a wall using 2 screws. |
|
|
|
Note
|
Two kinds of screws are included with a KX-T30865. Please choose the appropriate kind for your wall type. |
|
|
|
|
| : when a doorphone plate has been fixed to the wall |
|
|
|
| : when you wish to install the doorphone directly onto the wall |
|
|
| 3. |
Connect the wires to the screws located in the back cover. |
|
|
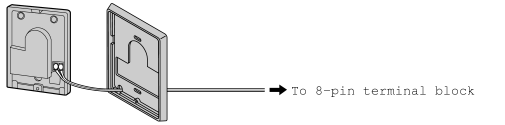
| 4. |
Re-attach the 2 halves and re-insert the screw. |
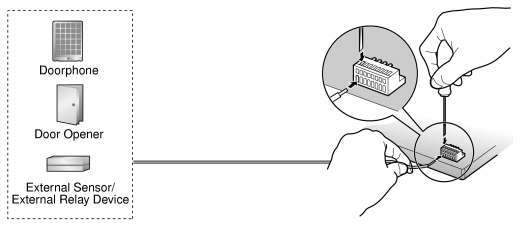
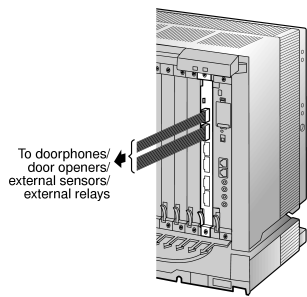
Connection
Use 8-pin and 10-pin terminal blocks (included with the card) for connection.
|
| 1. |
While pressing down on the hole at the top of the terminal block using a screwdriver, insert the wire into the side hole as shown below. Repeat this procedure for other doorphones, door openers, external sensors, and external relays.
Refer to "3.7.2 DPH4 Card (KX-TDA0161)" and "3.7.3 EIO4 Card (KX-TDA0164)" for pin assignments. |
|
|
| 2. |
Attach the terminal blocks to the connectors of the DPH4/EIO4 card on the PBX. |
|
|